The Tale of the Cat and the Bat
Three handy CLI tools for Linux and macOS: bat, tldr and neofetch
As a Linux and macOs command line interface user, I just came across three simple tools that I wished I had found earlier.
If you, like me, need to quickly peek inside the content of a text file within the bash (or zsh) shell, you will most probably use the cat command. There’s a better way to do this.

bat vs cat
The cat command stands for concatenation and that’s what it was designed for: to concatenate strings and text files. And it does quite a good job at that. However, it has found greater success and worldwide fame as a tool for inspecting the content of a text file by speedy typing into the terminal shell.
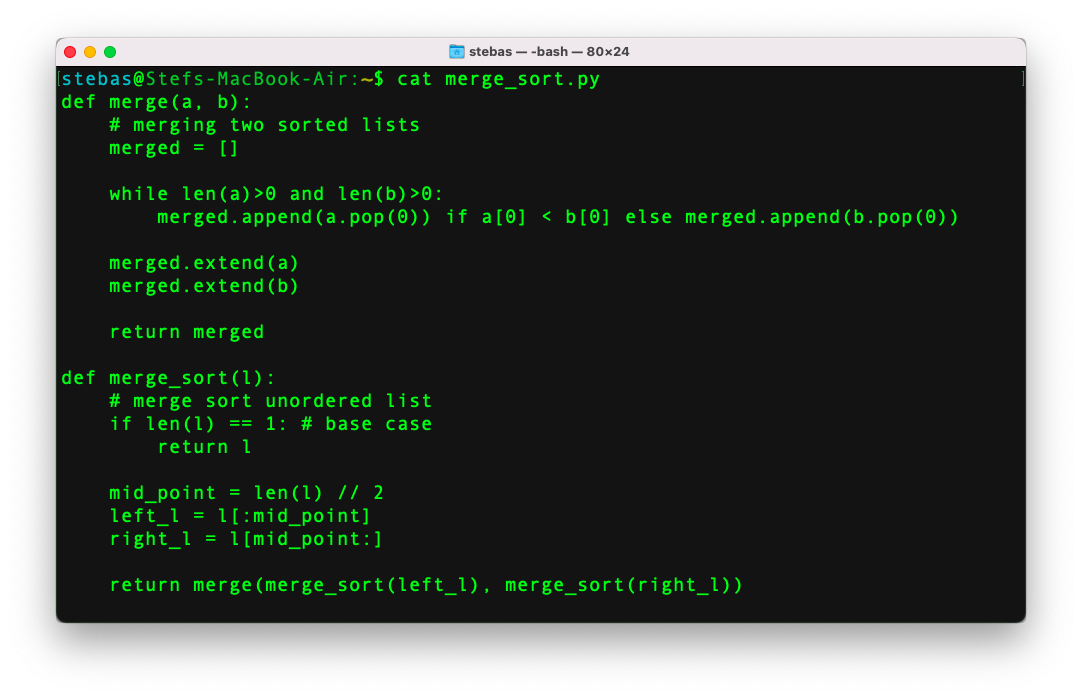
As an example, to check instantly the content of a script I can type:
$ cat merge_sort.py
and get:
If, instead, I use bat:
$ bat merge_sort.py
I get the following output:
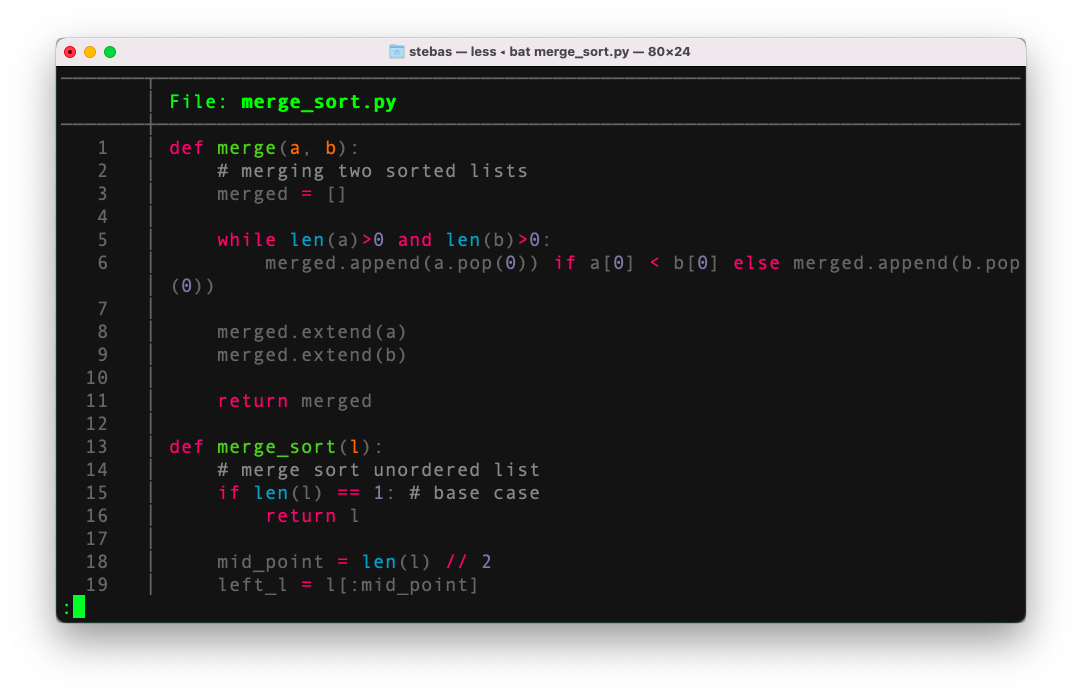
Which one is more pleasant and easier to read? That’s right: bat formats the text in a clear and visually pleasant way by including line numbers, syntax highlighting and pagination.
bat did not come preinstalled with my macOS. I installed it using Homebrew:
$ brew install bat
On Linux, the following should work (Ubuntu and Debian-like distributions):
$ sudo apt install bat
tldr vs man
What do you do when you need to know how to use a specific shell command? I bet you call the man!
Here is another time saver: by using tldr instead of man you get more streamlined and clear information.
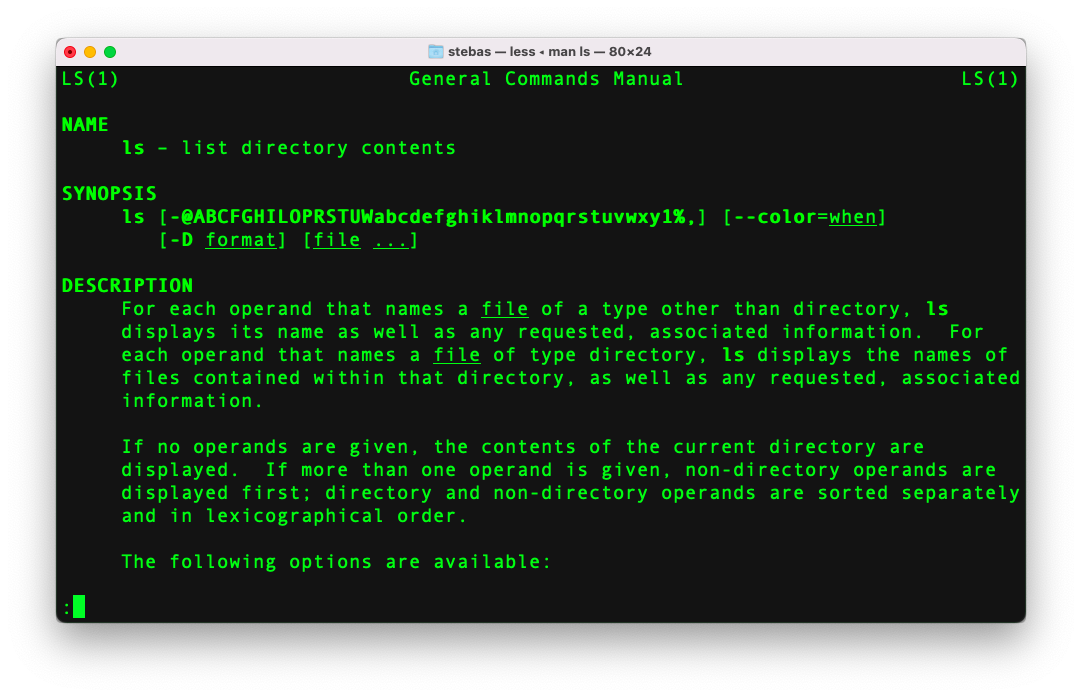
Check this out and compare:
$ man ls
which ouputs:
instead, tldr gets:
$ tldr ls
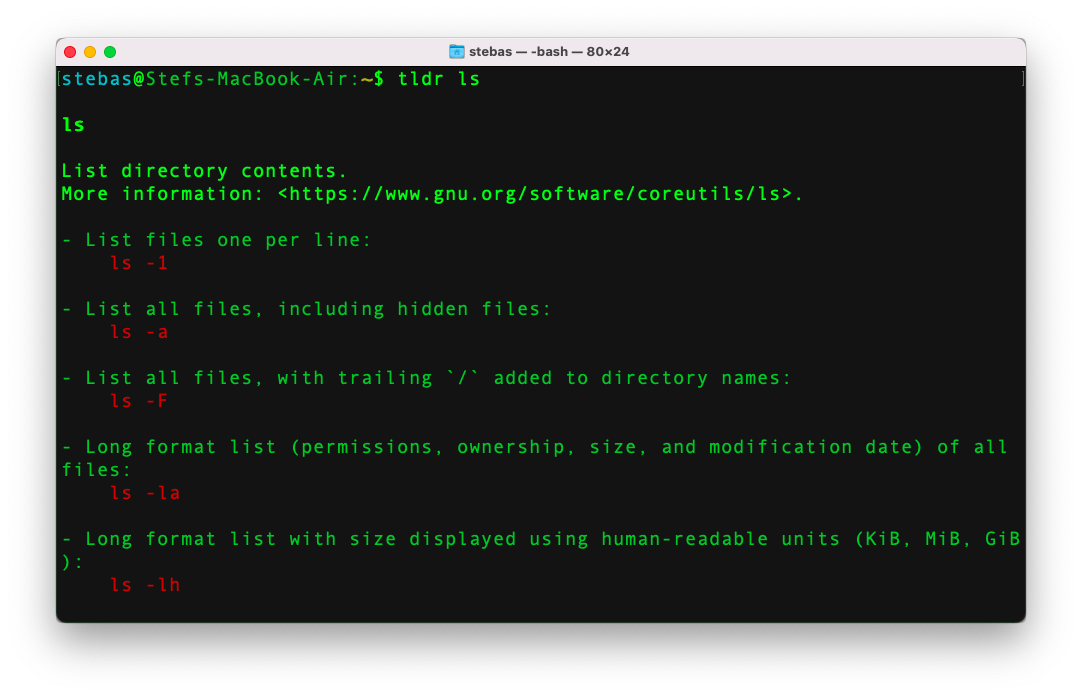
The content provided by the two commands is different: man generates the whole manual pages with descriptions, options, and so on. tldr, on the other hand, provides only some essential information. Which, in the vast majority of the cases, is all you need. This tool is an ongoing project: more on the tldr’s website.
Again, tldr was not included with my macOs installation. To install it using Homebrew:
$ brew install tldr
On Linux, use this (Ubuntu and Debian-like distributions):
$ sudo apt install tldr
neofetch
This is a straightforward little tool. To see what it does, just type in your terminal:
$ neofetch
You should get something like this:
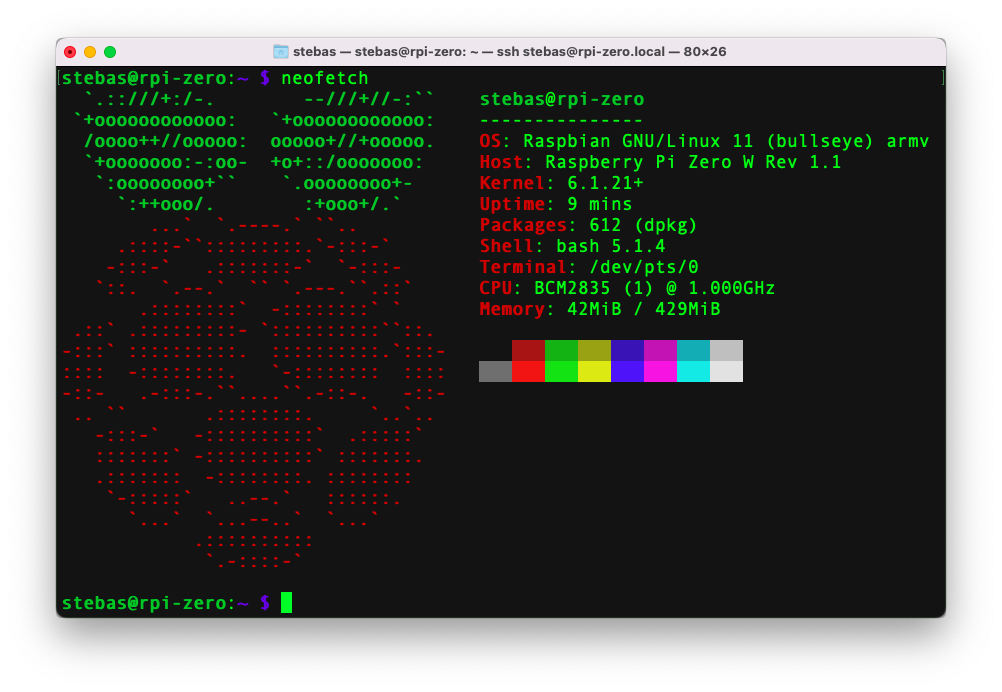
That’s what it does: it provides a screenshot of your system alongside your operating system’s logo. And, yes, I tested it by connecting remotely to a tiny RaspberryPi Zero machine: one of the cutest little computers ever. That shows how neofetch can be useful: there are situations when we need to provide system information to other people (for troubleshooting or other operations.) With neofetch we can instantly generate that information, copy, paste and forward to whoever needs it.
To install it on macOs:
$ brew install neofetch
And on Linux (Ubuntu and Debian-like distributions):
$ sudo apt install neofetch
I hope you enjoyed this post and find those tools useful!